
Oracle Cloud autoscaling lets us automatically adjust the number of Compute instances in an instance pool based on performance metrics such as CPU utilization, memory utilization. This helps us provide consistent performance for end-users during periods of high demand, and helps reduce your costs during periods of low demand.
The following are a few key components for Compute autoscaling.
1. Instance pool
Instance pools let you provision and create multiple Compute instances based on the same configuration, within the same region. An instance configuration is required for instance pool configuration. An instance configuration is a template that defines the settings to use when creating instances.
2. Cooldown period
A cooldown period between autoscaling events lets the system stabilize at the updated level. The cooldown period starts when the instance pool reaches a steady state. Autoscaling continues to evaluate performance metrics during the cooldown period. When the cooldown period ends, autoscaling adjusts the instance pool's size again if needed.
3. Performance metrics
Autoscaling relies on performance metrics that are collected by the Monitoring service. These performance metrics are aggregated into one-minute time periods and then averaged across the instance pool. When three consecutive values (that is, the average metrics for three consecutive minutes) meet the threshold, an autoscaling event is triggered.
OCI Compute Instance autoscaling has the following 3 basic steps.
- Create Instance configuration
- Create Instance Pool
- Create Autoscaling Configuration
Create Instance Configuration
An instance configurations let you define the settings to use when creating Compute instances. To create instance configuration. Click on the Navigation menu and then Compute and Instance.

Click on the name of an instance from which we are going to create instance configuration.

On Instance Details page, Click on More Actions and click on Create Instance Configuration.

On Create Instance Configuration page, Provide the name of Instance configuration and click on Create Instance Configuration.

Now once Instance Configuration has been created, we can click on Create Instance Pool to create instance pool from Instance Configuration Details page.

Create Instance Pool
Alternatively, click on Navigation menu > Compute > Instance Pools to create an instance pool.

Click on Create Instance Pool button.

On Create Instance Pool page, Provide the name of Instance Pool, number of Instances, instance configuration name.

Scroll down and on Availability Domain Selection 1 section provide AD name, Name of the Virtual Cloud Network, Subnet, and Click on Additional SelectionBasically I am planning to deploy 3 instances in 3 ADs so I am adding new AD detail for autoscaling instance by clicking Additional Selection.

On Availability Domain Selection 2 section provide AD name, Name of the Virtual Cloud Network, Subnet, and Click on Additional Selection. I am using the second AD, VCN, and my regional public subnet. I have clicked the Additional Selection button to add third AD.

On Availability Domain Selection 3 section provide AD name, Name of the Virtual Cloud Network, Subnet. Notice +Additional Selection button is already disabled because on the region I am using to host Autoscaling configuration has 3 ADs. Click on Create Instance pool.

Instance pool is provisioning.

Once Instance Pool is fully created it looks something like below.

Create Autoscaling Configuration
In Pool Details page click on More Actions and Click on Create Autoscaling Configuration.

Provide Autoscaling configuration name, Instance pool in Create Autoscaling Configuration page. In the case below I am using default cooldown value, 300 seconds.

Scroll down and provide Autoscaling policy name, Performance Metric, a minimum number of instances, the maximum number of instances, and the initial number of instances.

Provide Scaling Rule. Select scale-out and scale-in operator, threshold percentage, and a number of instances to add/remove. In my case, if CPU usage is greater than 80 pct for continuous 300 seconds then a new instance will be added and if CPU usage is less than 40 pct for continuous 300 seconds then 1 instance will be removed. Click on Create to create autoscaling configuration.

Once Autoscaling is configured and enabled it looks something like below.

Now on my instance page I can see three instances are created and among them 2 have status Terminating.

Connected to the instance using public IP.

Checked its uptime and CPU details.

Install Redhat package stress using yum.

Once a stress package is installed execute stress command to generate CPU load.

Notice load average has increased and the CPU usage percentage is 99.8

After 5 min of continuous load, we can notice that a new instance is provisioning.

Connect to the second instance and install the stress Redhat package on it.

Once stress command is executed, we can see the load average is increasing and the CPU usage is at 99.8%

On the compute Instance page, we can see the third instance is provisioning.

Within a few mins, there are 3 instances running from Autoscaling configuration.

Connected to the third instance.

Once the stress is timed out, load average and CPU usage have decreased on all 3 compute instances.
The load average is just 0.23 in the first instance.

The load average is just 0.04 in the second instance.

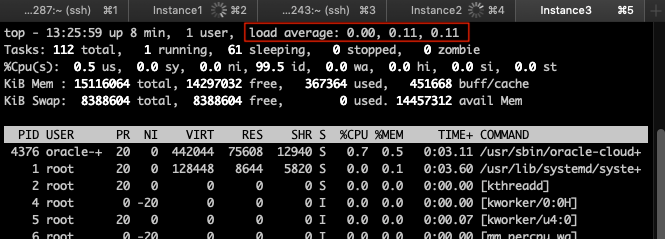
The load average is just 0.00 in the third instance.
Once CPU usage is below 40 for a continuous 300 seconds, the second instance state changed to Terminating.

Again after 300 seconds, the third instance state changed to Terminating.

Finally, we have a single instance running. We have defined 1 instance as minimum instance so 1 instance will keep running forever and instance get provisioned up to 3 while CPU on the instance is more than 80% used and it gets reduced to minimum value 1 if the CPU load is below 40% used.


